in

Latest Search Reports

April 2008 - Posts

  • Closing Thoughts

    David Mearns – Search Director, The Finding Sydney Foundation

    Looking back on the 43 days since we began mobilising the SV Geosounder on February 27th I can safely say that the Finding Sydney Foundation team, including all their offshore subcontractors, exceeded the highest possible expectations anyone could have before the project started. 

    Of course the headline news was that HMAS Sydney II was finally located 66 years after her sinking and the tragic loss of the entire ship’s company of 645 men.  This stunning achievement, along with everything else accomplished during the expedition, as I have summarised below, must be viewed in the context that locating Sydney was never going to be a sure bet.  In fact there was a considerable chance of failure and there were many doubters who increased the stakes and pressure with their opposition.  For this reason I feel that full credit must be paid to the Commonwealth Government of Australia, the state Governments of WA and NSW, all the private donors large and small, the RAN, the Sydney relatives who fully supported the search and of course the Finding Sydney Foundation.

    Project Accomplishments:

    • HSK Kormoran was located in 64 hours of active searching.
    • A total of 3 “high-resolution” side-scan sonar passes were made over the wreck of Kormoran which allowed us to confirm its identity on the basis of the sonar data alone.
    • HMAS Sydney (II) was located in 67 hours of active searching.
    • A total of 4 “high-resolution” side-scan sonar passes were made over the wreck of Sydney which allowed us to confirm its identity on the basis of the sonar data alone.
    • Both wrecks and their associated debris fields were filmed in high-quality video totalling approximately 60 hours and an additional 1,435 still photographs were taken.
    • Commemorations were held at sea directly over both wreck sites.
    • The Prime Minster, Kevin Rudd, separately announced the discovery of both wrecks to a waiting Australia (we missed a single announcement for both wrecks by just 1 hour).
    • As a result of being located both wreck sites are now legally protected under the Historic Shipwreck Act of 1976 and hereafter will be managed by the Department of the Environment Water, Heritage and the Arts.
    • A Commission of Inquiry led by Terrence Cole QC will be conducted to inquire into the circumstances of the loss of HMAS Sydney.
    • The Finding Sydney Foundation’s website received over 12 million hits during the course of the expedition.
    • Over 60,000 unique visitors visited the Virtual Press Room to receive media information.
    • A documentary of the search expedition will be broadcast on ABC on April 15th, less than 1 week after the project has been completed.
    • Most importantly, over 900 families related to men lost with the sinking of Sydney have contacted the RAN’s Relative Helpline and registered their details.

    Although it involved an enormous amount of work and commitment over a period of 5 years I also realise that I was enormously privileged to lead such an important search on behalf of The Finding Sydney Foundation and I wish to thank the Directors, past and present, for their support and trust.

    Finally, I want to express my deep appreciation to Patrick Flynn, Commander Fiona McNaught of the RAN and John Perryman of the Sea Power Centre for their professionalism in handling such an unusual, and at times difficult project.  John, in particular, has been with me every step of the way giving me good advice when needed and his role in the success of this project can not be overstated.  Every single day with John was a fascinating lesson in the history of the RAN and good fun.

    Glenys McDonald - Director, The Finding Sydney Foundation (Observer)

    As we bring our blogs of the search for HMAS Sydney to a close, I have to pinch myself when I realise just how successful we have been.  It is difficult to comprehend that David, John and I have been on the MV Geosounder for about seven weeks.

    It seems a far cry from the day I arrived during the mobilisation phase and met the Williamson crew from Seattle.  As the crane lifted all their sensitive equipment on board I noted confidence amongst the chaos, even in the 40 degree heat.  I was in a panic that day because of the unfamiliar surroundings and fear of the unknown.

    The first lesson I had to learn was patience, as the road to this success has not been easy.  We seemed doomed before we began with mechanical, technical and weather down time. There were days on end when we were unable to function because of not one but two cyclones, days when some people were seasick (I was one of the lucky ones) and days when sensitive electronics like the sonar and ROV were not operating as we might wish.  I learnt to have trust in the expertise of the professionals who knew how to do their job, and just let them get on with it.

    There were disappointments too, when interesting targets turned out to be geological on closer analysis.  But as long as I live I will never forget the feeling of seeing the sonar images of first Kormoran, and then HMAS Sydney for the first time.  

    The most frustrating period for me was the long delay in port between the first phase and the second ROV phase over the Easter period.  But all that paled into insignificance when on 3 April we lowered the ROV to depth over HMAS Sydney.  I was incredibly nervous as we waited for the first video footage of Sydney to appear on the screen.  We were not disappointed and after working day and night for several days we have an incredible video record of both ships and debris fields.

    This search is also about people: the five volunteer Directors of Finding Sydney Foundation who refused to give up; the folk who funded us; the team work on board despite incredibly long shifts and the friendships made; and most of all it is about the relatives of the lost mariners to whom we bought a mixture of joy and sorrow when we finally told them where they loved ones were.

    John Perryman – Senior Naval Historian (Observer)

    Yesterday afternoon, having completed our examination of the Kormoran and her associated debris field, we shaped course for the Sydney wreck site to conduct one final ROV pass in an attempt to find the few remaining large ship fittings thus far unaccounted for. These included the second set of quadruple torpedo tubes, the main mast, four ships boats, and two sets of large boat davits.

    It was certainly worth the effort, as later in the evening we found all but the remaining boats and davits. We also found the middle section of the High Angle Control Station tower which had severed from its mounting at the rear of Sydney’s bridge behind the Director Control Tower. This was an unexpected but most welcome surprise.

    At 2342, satisfied that we had now examined and recorded as much of the debris field as possible, David Mearns declared the survey and search for the wreck of HMAS Sydney (II) complete. Amidst a sense of pride and achievement the team congratulated one another on a job well done.

    As the ROV made its ascent to the surface, the light cast by its powerful underwater lights on Sydney’s wreck began to fade. Once again the pride of the Royal Australian Navy’s World War II fleet was left in peace, concealed and safe in the depths and darkness of her underwater sanctuary.

    There is no doubt that this voyage of discovery and commemoration has been a resounding success for all concerned and I am very proud to have played a part in its planning and execution. As this will be my final contribution to this search diary I would like to extend my personal thanks to all those people, throughout Australia and overseas who never lost faith in the search team’s ability to find the wrecks. The staunch, unwavering support of these individuals helped to make the search a reality and to all of them I extend a sincere vote of thanks.

    To the many relatives of those lost in this great warship who have carried pain, anguish and grief for so many years, I sincerely hope that the knowledge of knowing where their loved ones now lie brings them some sense of solace.

    Dr. Michael (Mac) McCarthy – Curator of Maritime Archaeology, WA Museum (Observer)

    HMAS Sydney and HSK Kormoran became the most sought after of any shipwreck in our nation’s history. This has lead to the expenditure of hitherto unprecedented amounts of time, funds and resources in research, seminars, inquiries and now search.

    Being sometimes quite complex and often difficult to understand at a glance, those interested in the reasons why the search took so long are referred to Museum Report Number 230 (see link below).  In essence the failure to grasp the moral obligation we all share in trying to ensure that the circumstances whereby people are lost or injured in Service are properly explained was a fundamental cause. Associated and intertwined is the failure to properly attend to the needs of those bereaved or affected by death or injury of relatives in public service.  In the HMAS Sydney case a ‘fair go’ was patently not forthcoming. Therein lies the source of the frustration and anger so often vented at the authorities. Thankfully as a nation we are now turning that corner.

    That the search and survey just completed has been conducted with experts from overseas, in the presence of independent observers, with rapid and effective overnight reporting back to the nation (when weather and technical faults have not conspired to produce inactivity) is unprecedented. That provision for verifiable hard copy data with independently-generated records all linked in time and place has been made, is again unprecedented.  It has to be, for the reasons outlined above.

    The microcosm that was life on SV Geosounder for 43 days, the sailors, galley staff, stewards, engineers and officers (men and women from across Australia and from overseas) used every moment of their free time to crowd into the search and survey control room to watch the work. That is a reflection of the interest the search has generated. Millions from other ships, from farms, sheep stations, towns and cities watched from the wider world.  While there was a natural curiosity, for many, if not most, a satisfactory explanation for Australia’s greatest maritime and wartime mystery was being sought.

    The two wrecks and their debris fields are now protected under the Commonwealth Historic Shipwrecks Act. That future access to their restricted zones will again be the subject of stringent entry and reporting requirements attests to their ongoing importance as heritage sites. That they remain the property of the services whose flag they once fought under, yet are protected by an act that makes those same properties part of the national estate, again places them in a very rare category indeed. These are national icons.

    For many this successful search is finality. For some it is but a continuation. For others it is only the beginning, for an independent inquiry has been announced. In these last cases let us hope that the lessons learnt to date will lead to exhaustive archival search, objective research, debate and well-reasoned analyses and conclusion on all fronts and at all levels. Above all let us hope that the sacrifice of those who we now know so desperately died in service on HMAS Sydney is honoured. This crew died trying to make our nation a place where diversity of opinion could thrive, where respect to others would be shown and where all were to be given that fair go.

    www.museum.wa.gov.au/collections/maritime/march/publications.asp.

    Photo Above: (left to right) Glenys McDonald, David Mearns, John Perryman, and Mac McCarthy with the Explorers Club Flag awarded to David Mearns - a Fellow of the EC - to carry on this expedition.

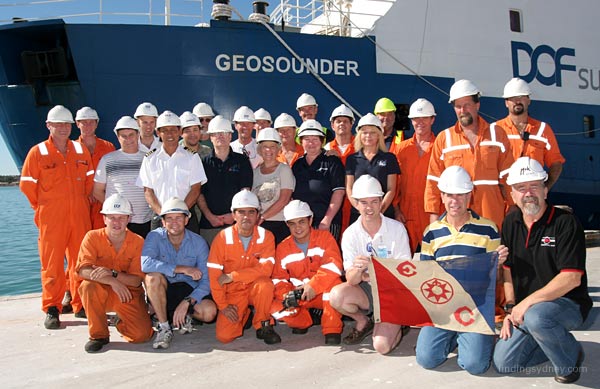
    Photo Above: The expedition team back in Geraldton following the successful ROV video investigation of the wrecks.

    Patrick Flynn - Project Manager, The Finding Sydney Foundation

    Supporting the Directors of the Finding Sydney Foundation (Ted Graham, Don Pridmore, Glenys McDonald, Bob Trotter and Keith Rowe); our offshore Search Director (David Mearns); our Contractors (DOF Subsea Australia P/L, Williamson & Associates of Seattle, and Electric Pictures P/L); and the Royal Australian Navy throughout the search was a small and dedicated group - Richard Sojka our IT/Internet Manager and Leeanne Evans and Penny Buchan, our office management team, whom I thank for their efforts in helping to keep the rudder straight and the sails aloof. 

    Valuable legal support from Tim Cocks, Paul Hopwood, Mal Hartford and Minal Shah enabled our contractors to deliver their professional services and equipment in a compressed schedule.  I also wish to acknowledge the facilities provided by the Mayor of the City of Geraldton-Greenough and the services of various contractors that aided the search vessel SV Geosounder whilst in Geraldton port.  

    I treasure the legacy of the search for HMAS Sydney and HSK Kormoran and sincerely trust that by locating and providing their resting imagery in the deep waters of the Indian Ocean, we have provided some comfort to the many relatives and friends of the sailors and airmen whose lives were lost on 19th November 1941.


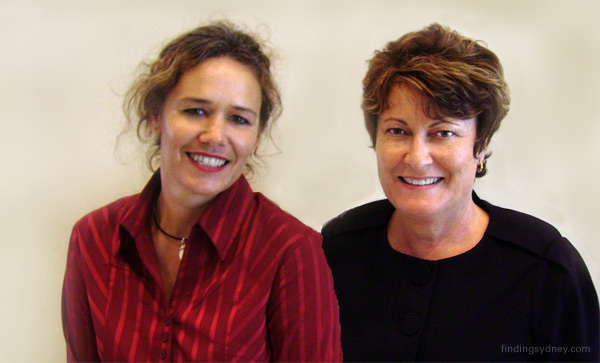
    Photo Above:  Office Management for The Finding Sydney Foundation, Leeanne Evans (left) and Penny Buchan (right)

    Richard Sojka - Internet & IT Project Manager, The Finding Sydney Foundation

    On behalf of the IT/Web Team at findingsydney.com it has been our pleasure to bring the Search for the HMAS Sydney II to the world via the internet.  Having personally been involved with the project for some seven years, I fully understand what the find and subsequent imagery has brought to the relatives of the brave men who gave their lives for their country.  Also the level of interest both in Australia and overseas, the search has attracted.

    The Search website although existing for many years as an appeal was upgraded on the 27th of February 2008 to commence reporting on David Mearns search team progress to the public and the media, bringing the subsequent finds to the world.  Since this date we have currently received more than 12 million hits to the sites, serving more than 350 gigabytes of bandwidth data over the course of 43 days, with zero downtime.  We have had more than 60,000 unique visitors  to the Virtual Press Room alone to download information, which provides some indication to the extent this story has interested media outlets everywhere.

    We have received much thanks and praise for our efforts in publishing the information contained both in the public and press room websites and have been extremely pleased that we have managed to bring you news and blogs as quickly as possible, with the compelling images and footage from the ROV.

    The high definition images published for media distribution at the Virtual Press Room are the exact unaltered versions we received from the Search team on board the SV Geosounder.   These images were compressed to a smaller size for the public to view in photo galleries and blogs due to bandwidth constraints.  Aside from a small degree of sharpening to compensate for the lowering to a smaller image size, the inclusion of watermarking of “findingsydney.com” on the bottom right hand corner of blog photographs, the web team has gone to great lengths to ensure the images you have seen are as true to the originals as possible.  The streaming video footage from Electric Pictures was reduced to a smaller scale for streaming and delivered as per the original source.

    As the Finding Sydney Foundation is a non-profit organisation, we do not use advertisers on our sites to subsidise our web costs.  Subsequently a very small web team has done an extraordinary job of publishing and delivering a high profile story to the world, in a very short space of time, within budget.  It has been with care and respect for the crews of both the HMAS Sydney II and the HSK Kormoran, and their many relatives of these men that we have made every effort to ensure the websites are maintained and evolved for future generations to remember.

    There have been a number of IT tasks undertaken during the course of the project, the most significant being the collation and storage of 1,435 still ROV images and approximately 60 hours of underwater digital footage from the Search Project.  This was successfully completed today, with the unaltered source files archived with the Finding Sydney Foundation for  historical record and copies being provided to contractual parties.

    I would personally like to thank the board of the Finding Sydney Foundation and the Project Manager Patrick Flynn for supporting our team with their strong belief in ensuring information is reported accurately and rapidly to the public.  It has been a great pleasure to be involved in such a historical and worthy project.

    Lest We Forget Sydney

    Photo Above: Richard Sojka, Foundation Web and IT Manager (right) being congratulated for his work with Finding Sydney Foundation by the Premier of Western Australia the Hon Alan J Carpenter MLA (left)


  • 7th April 2008 Report

    David Mearns – Search Director, The Finding Sydney Foundation

    Before the start of our ROV dive on Kormoran’s wreck and debris field I cautioned everyone that in contrast with HMAS Sydney the wreck of Kormoran was going to be in a very bad state and that it was going to be extremely difficult to identify individual pieces of wreckage in the debris field.  I did this because I wanted everyone to be prepared for what they were about to see.

    As some of today’s images will show most of Kormoran’s hull has been absolutely obliterated by the final explosion, which reduced much of her structure to wreckage that is so completely twisted and torn it is virtually impossible to identify what part of the ship it comes from.  I have no doubt that it was the simultaneous detonation of Kormoran’s cache of over 300 mines that ripped her apart and left the scene of utter destruction we were witnessing.  The German Captain Detmers and his fellow officers had vividly described this explosion but here was the proof, once again, that they were speaking the truth and this was plain for everyone to see for themselves.  The most amazing thing was that Detmers - who left Kormoran last - and those in the last lifeboat with him somehow miraculously avoided being hit by this wreckage, which clearly rained down over an area covering hundreds of metres.

    The other important aspect we were able to verify was the methods the Germans used to conceal their dangerous guns in a way that allowed them to escape detection by other ships but also to de-camouflage very quickly when needed.  There has been considerable doubt about the German claims that they could de-camouflage in a matter of seconds so it was especially important that we try to document exactly how the concealment flaps and covers were engineered.  In terms of the engineering what we found was ingeniously simple and obviously designed for fast and efficient operation.  Moreover, when you consider that Kormoran’s crew had perfected their de-camouflage techniques at least 10 times in previous battles and that they were drilled on a regular basis by Captain Detmers it is now easier to accept German claims.

    The final unexpected bonus of this dive came when I spotted some writing on an enormous piece of wreckage that we struggled but finally succeeded in identifying as lower hull plate from Kormoran’s port side.  The only identifiable feature for orientation was the bilge keel running left to right, but just below it painted in white were the small number and letters “08KO”.  It is incredibly rare to find any writing on a shipwreck, never mind painted writing which is almost always obscured by corrosion and/or sedimentation.  But there was little doubt that here on the underside of the hull in the most unusual of places was writing that positively identified the wreck as being Kormoran, the German auxiliary cruiser designated number 08.

    Glenys McDonald - Director, The Finding Sydney Foundation (Observer)

    Our inspection of the Kormoran wreck began with a hitch on Sunday night at 8pm when we were unable to get the ROV out of the garage. However as the first eyes to look on Sydney’s nemesis in more than 66 years we were amazed at the excellent condition of the hull.  After a two hour circuit of the starboard side of the wreck we recovered the ROV for a slight repair and preparation for the next dive.  We were in for a long night/morning.

    At midnight we were back at our posts in the survey room and were glued to our seats for the next ten hours straight.  The ROV performed perfectly and although the water clarity was at times not as good as the Sydney site, we got remarkable footage and stills.

    The first thing we noticed was a light coloured paint band around the bow.  As we proceeded along the starboard side we looked for items to do with the concealment of the guns and torpedoes.  The torpedo flap was open and we took photographs of the hinges but it was difficult to look inside.  The big 5.9” gun on the forecastle was free of concealment and trained forward.  As we looked at the other 5.9” gun on the port side there were signs of paint discolouration on the barrel possibly from the intense heat. We examined the 2” guns and on both sides and the guns were missing, leaving only the mount.

    Of great interest was the examination of the starboard and port underwater torpedo tubes.  These were oval in shape with no form of concealment and there were seven strakes between the well deck and tube. The cargo hold was empty although what looked like a boat cradle was evident. I could not help but be impressed at the apparent neatness of this ship, even though she had been ripped apart by a huge explosion from the bridge superstructure to the stern.

    When you have been awake for so many hours it is a wonderful gesture when Jo the cook, sent Sonia down with toasted sandwiches.

    John Perryman – Senior Naval Historian (Observer)

    Having arrived at the Kormoran wreck site during the afternoon of 6 April we conducted our first dive on the German raider between 20:00 and 21:00.  Unfortunately this dive had to be cut short due to the ROV becoming lodged in its garage.  We were, however, able to carry out a short preliminary examination of Kormoran from within the garage, from which we viewed a number of distinguishing features and confirmed her identity.

    At 00:50 we again closed up to continue our survey of the German raider.  The ROV maintainers had succeeded in clearing the obstruction that prevented the submersible from exiting its garage and it was soon on the sea bed at a depth of 2580m.

    During the next six hours we retraced our steps around Kormoran and David Mearns was able to capture some very crisp imagery of what remained of the battered auxiliary cruiser.  The largest part of Kormoran consisted of the well deck and bow section forward of where the main superstructure screen was supposed to be. Everything behind this had been completely obliterated, scattering chunks of twisted debris for hundreds of metres around the wreck.

    The fore part of Kormoran immediately became our main target of interest and I was extremely interested to view this mysterious chameleon of the sea.  We quickly identified the openings for her above water torpedo tubes which were easily identifiable by a rectangular steel plate flap which was in the open position, raised at 90 degrees.  Unfortunately we were unable to get the ROV into a position to view inside the opening and therefore could not determine what state the torpedo tubes were in. As we manoeuvred the ROV lower down the ships port and stbd sides we found the oval openings for both of the fixed under water torpedo tubes.

    Returning to main deck level we observed the three forward holds, the centre one of which housed one of Kormoran’s 5.9-inch guns.  This gun appeared largely in tact in spite of the presence of downed derricks and Samson posts which lay across her deck.  The gun was trained to starboard on a relative bearing of approximately 135 degrees.  Continuing forward we observed displaced and empty boat cradles in cargo hold number one before continuing to the raised forecastle deck.

    Immediately below the aft end of the forecastle were the two forward 5.9-inch guns, their concealing steel covers were gone and both were trained in the fore and aft position.  On the deck above we observed the mounts for the smaller calibre 2-cm guns.  Although the actual guns were gone, the port mount’s concealment remained and confirmed that these weapons were raised hydraulically from the deck below once their covers were removed.

    After examining the main part of the Kormoran wreck we proceeded into the vast debris field looking for large pieces of wreckage. Few were encountered and due to the damage caused by the detonation of Kormoran’s 300 plus mines, it was very hard to determine what they were.  We believe we found part of the forward deck house and also what appeared to be one of Kormoran’s engines. What was clear to me is that Kormoran’s demise was violent and complete.

    Dr. Michael (Mac) McCarthy – Curator of Maritime Archaeology, WA Museum (Observer)

    One of the great expectations I had of both HMAS Sydney and HSK Kormoran would be that they would conform to what in maritime archaeological circles is known as the ‘waterline theory’ i.e. that wrecks lying upright on a soft bottom sink down to the waterline, precluding a look  at what has happened below the waterline.  At HMAS Sydney it certainly didn’t hold good for she lies on a veneer of soft sediment overlying a compacted firm bottom.  Though she was on a slight heel, on both her port and starboard sides her bilge keels were visible, showing an intact hull  below the waterline in all bar the break in the bow on the port side where the Kormoran’s torpedo hit.

    As we approached the Kormoran near midnight Sunday I wondered what would be the case there.  So too did the Electric Pictures camera crew of Matthew Kelley Director; Ulrich Krafzik cinematographer and Christopher MacGregor the sound recordist. ‘Ulli’ was especially interested for he had been born in Kiel and lived in Hamburg as a boy; moving to Australia just 12 years ago.  The relief on his face was obvious when I told him that the disguised heavily armed cargo boat was a British invention.  Called  ‘Q Ships’ they became famous in WWI for tricking U-boat commanders into thinking they were harmless steam or sailing tramps, only to be met with a hail of devastating fire on surfacing to finish of their hapless victim.  They proved so successful that they are mentioned in Shipping Wonders of the World, one of my favourite books when I was young. 

    At Kormoran it was exactly the same situation as with HMAS Sydney, with the bilge keels visible on both sides aft.  This left both her underwater torpedo tubes clearly visible even though in part they dripped with the now well-known ‘rusticles’ of Titanic fame.  The other great surprise was that the hull abruptly ended at the bridge and it had totally disappeared; a full two thirds of the ship and all its contents gone.  What was equally odd for me was the empty starboard hawse. It certainly once had an anchor, for the scrape of its flukes against the hull was clearly visible.

    Soon we spotted it, still attached to its chain just inboard of the hawsepipe, its shank lying on the forepeak deck, but the flukes had gone!  That certainly raised a lot of unanswered questions amongst the crew of Geosounder who when off watch or off duty in the galley, gathered to watch events unfold.  Sometimes nearly 20 folk in all were crowded in.
     
    At 0423H we retrieved the ROV and headed for the first of the Kormoran debris fields.  It had two elements, one 490m away on a bearing of 211 degrees from the Kormoran’s hull and the other 1200m away on a bearing of 351 degrees. The first comprised two very large targets surrounded by hundreds of smaller strikes. They were found to be parts of the superstructure nearly 15m high and twice that in length.  The second was the engine sitting on its elevated double bottom under collapsed plates and what appeared to be skylights . It too was c. 15m high. On one section of hull plate hiding it from view, was clearly visible in paint 08KO, clearly a reference to Kormoran.  Also clearly visible was a stockless anchor that had torn its way deep into the same plates. While otherwise in perfect condition, its shank had disappeared!

    Above Photograph:  The simple flap designed to conceal the starboard and port above-water torpedoes shown here on the starboard side in the open position.

    Above Photograph:  The opening of Kormoran’s underwater torpedo tube on the starboard side.  Although rusticicles are partially obstructing the opening it can be seen to be oval in shape to allow firing of the underwater torpedoes at the angle from which the tubes are mounted in the hull.

    Above Photograph:  The break in Kormoran’s riveted steel hull bears testimony to the violence of the detonation caused by her scuttling charges and mines that sent her to the bottom.

    Above Photograph:  5.9 Gun:  Kormoran’s 5.9-inch gun in the forward hold pointing to starboard and aft of the beam.

    Above Photograph:  An example of the many large pieces of twisted metal scattered throughout Kormoran’s vast debris field.

    Above Photograph:  Another large piece of wreckage shows a confusing jumble of pipes, cable and hull structure.

    Above Photograph:  The writing “08KO” painted in white on the hull just beneath the bilge keel identifying the wreck as HSK8 Kormoran.  This is the actual photograph as taken by the ROV, but the image must be turned around to read the writing correctly.

    Photo Gallery Slideshow available at http://www.findingsydney.com/gallery.asp


    IMPORTANT NOTICE: The Material (including photographs) available in the "Press Room" section of this Website may be used/reproduced unaltered by your organisation (unless stated otherwise within the content description) subject to the terms and conditions set out in the Legal Section AND any Material (including photographs) which you use/reproduce must credit the source as "The Finding Sydney Foundation" and, as an option, you may also link the source statement with the website address http://www.findingsydney.com/.

    Photographer: David Mearns

  • 6th April 2008 Report

    David Mearns – Search Director, The Finding Sydney Foundation

    I was expecting another long day (and night) today diving on the sonar targets we named as the “battle site” between Kormoran and Sydney largely because of their location on a line that approximates very closely the projected line of the battle.  In the end the dive was very short for the surprising revelation that the sonar targets were actually a field of very large rocks!  When the first angular rock face came into view I exclaimed “its geology” and almost immediately realised that this wasn’t going to be just one isolated rock amongst a field of Sydney’s wreckage, but that all the sonar targets were going to be revealed as rocks instead and that our original interpretation was wrong.

    The reason it was so easy to let go of this interpretation was that we had just spent the previous dive finding and cataloguing so much of Sydney’’s superstructure and deck equipment in the debris field that it was becoming increasingly hard to understand what sections of Sydney might be found at the battle site.  Also, we had been fooled earlier during the search phase by a similar outcropping of angular rocks that we ruled out by way of some high-resolution sonar passes.

    Before the ROV reached the seabed I said to Matthew Kelley, the documentary film director, “be prepared for a surprise”.  As surprises go this one is actually quite pleasing for I believe it will simplify our understanding of what happened to Sydney.

    On my way to becoming a shipwreck hunter I earned degrees in marine biology and marine geology so please forgive me for including this picture of the rock, and friendly settlers, that fooled us.

    Above Photograph: One of the angular basaltic that is now the shared home of a deep-sea anemone, stalked sponge and sea fan.

    Photo Gallery Slideshow available at http://www.findingsydney.com/gallery.asp


    IMPORTANT NOTICE: The Material (including photographs) available in the "Press Room" section of this Website may be used/reproduced unaltered by your organisation (unless stated otherwise within the content description) subject to the terms and conditions set out in the Legal Section AND any Material (including photographs) which you use/reproduce must credit the source as "The Finding Sydney Foundation" and, as an option, you may also link the source statement with the website address http://www.findingsydney.com/.

    Photographer: David Mearns

  • 5th April 2008 Report

    David Mearns – Search Director, The Finding Sydney Foundation

    The top objective of today’s ROV dive to HMAS Sydney’s debris field was to identify the largest sonar target, which I was confident was Sydney’s detached bow.  This was achieved, along with many other objectives, very early in a highly successful dive that lasted over 17 hours and yielded another 421 still photographs.  For all the difficult and frustrating time we endured dealing with technical problems and awful weather, the results over the past several days have truly been worth the wait many times over.

    Sydney’s debris field yielded up a large amount of her superstructure and deck equipment that we found missing from her hull.  Our finds included: the bow, director control tower and roof of the compass platform, both masts, the radial engine and possible framing of the Walrus aircraft, the entire aircraft catapult, an intact funnel, the high angle control station, one of the port side 4-inch high angle guns, a couple of 0.5-inch machine gun mounts, five of Sydney’s wooden boats, one of the quadruple torpedo mounts with 2 torpedoes still loaded and one loose torpedo, various winches and spools of wire, a gas mask and a number of loose shoes.

    Nearly everything found in the debris field listed above, excluding the bow, would have been ripped away from Sydney by the enormous water forces as she sank at rapid speed.  The general absence of twisted and torn hull plating in the main debris field tells me that it is probable Sydney did not suffer any large explosion in her bow.  It seems increasingly likely that Sydney’s bow, severely damaged and weakened by the torpedo strike, broke away with Sydney pointed on a heading of 140 degrees, and still possibly underway.  All the evidence indicates that the weather and sea conditions worsened on the evening of November 19th and rough seas may have played a factor in Sydney losing her bow and finally sinking.  A number of other WWII ships were torpedoed in the bow like Sydney but none lost their bows, nor sank.  Desperately unlucky, Sydney appears to be the first.

    Glenys McDonald - Director, The Finding Sydney Foundation (Observer)

    On Saturday I saw team work at its best.  At 11.15am we commenced a detailed inspection of the Sydney debris field and almost immediately we came onto the entire main mast complete with Crow’s Nest.  As we moved over targets our collective pool of expertise, photographs and plans of HMAS Sydney on hand in the survey room assisted greatly.  John Perryman did an incredible job for us this day.

    There was anticipation as we approached our second target which we believed to be the bow of Sydney. The bow was inverted with both anchors and numerous scuttles (port holes) visible.  The scuttles were counted from the bow to the break to determine the break had occurred in the vicinity of water tight bulkhead No 5. 

    The amount of debris logged and photographed is too extensive to go into here, but at various times the excitement mounted as we struggled to identify objects, some of them badly tangled or upside down.  One such piece was the Director Control Tower with part of the Bridge roof lying over it. The ROV team did a superb job filming every detail of this structure, and the sharp edges of some of the debris meant that the ROV crews had to be particularly skilled.  Where possible we zoned in on objects, for example we were able to read the brand “Barnett” on a rubber tyre.

    The greatest and most overwhelming part of a long day however was the finding of five lifeboats.  These all sat pale and ghostly on the sea floor, still proudly displaying their anchor emblem, white with a blue anchor on some boats and blue with red anchor on another.  In one case we located one lifeboat resting over the other.

    The finds continued to fill us with awe. Just prior to a tea break we saw the first of many black shoes.   A torpedo trolley caused debate for some time as did a piece of debris with letterbox like slits.  This turned out to be a boat cradle base.  There was various shell cartridges and one torpedo, not far away from where the torpedo tubes, with two torpedoes still in the right hand side were located.

    By 04.00am we had completed (and I had logged) the traverse of the debris field. I called it a night and went to bed, it had been a day that words cannot even begin to describe and I am so privileged to have been part of it.

    John Perryman – Senior Naval Historian (Observer)

    Having spent two days concentrating on surveying the wreck of HMAS Sydney (II) it was now time for us to venture into her nearby debris field some 450 meters to the north of her position.

    We had tracked a number of large contacts of interest strewn amongst the debris field on our side scan sonar during the search phase, and it was now time to try and determine what these were.  We closed up in the survey room in Geosounder shortly after 11:00 and twenty minutes later the ROV came upon Sydney’s foremast lying on the seabed.  This was readily identifiable by its height, wire aerials and the distinctive crow’s nest which was still affixed to the masthead.

    Having obtained imagery of the foremast, the ROV was maneuvered toward the next large contact which turned out to be Sydney’s severed bow lying upturned on the sea floor. Both of her anchors were all the way home in the hawse pipe and secure.  We were able to determine where the bow had severed by counting the scuttles aft of the anchors. Totaling six, we concluded that the bow parted approximately 66 feet from the stem of the vessel.  Lengths of chain cable were strewn in the vicinity of the bow and an inspection of the bows opening revealed that all of the forward decks within it had collapsed.

    The ROV then carried out an inspection of the sea bed for other significant pieces of debris.  Before long we came across a large structure which we were initially unable to identify. After some time we determined that it was actually two large pieces lying on top of each other.  A close investigation soon revealed that we had found the distinctively shaped flat bridge roof top, resting over the front of the Director Control Tower.

    As the afternoon progressed we identified numerous pieces of wreckage including the a funnel, ships aircraft catapult, aircraft engine, starboard forward 4-inch Mk V gun, 20-inch searchlight, port 12-foot UK-1 rangefinder and five of Sydney’s nine boats.

    The discovery of the boats in the debris field was both remarkable and sobering.  We were able to identify several different types of boats ranging in size from 27-foot whalers to the larger 35 and 36-foot motor cutters. Distinguishing features included the presence/absence of propulsion and the type of build such as clinker or carvel. Some showed signs of damage by gunfire and in one instance two of the boats were resting on top of one another.  This certainly supported our earlier assessment that few of Sydney’s boats were launched following the action.  The most striking feature, however, was the presence of Sydney’s badge mounted proudly on the bows of all boats found. These carefully hand painted coloured icons remain in tact, undisturbed, and will continue to serve as a silent epitaph to HMAS Sydney (II) and her valiant crew.

    Dr. Michael (Mac) McCarthy – Curator of Maritime Archaeology, WA Museum (Observer)

    The examination of the HMAS Sydney debris field commenced at 1110H on Saturday 5 with the ROV’s arrival at the first of many targets plotted by Williamson and Associates Senior Geophysicist Mike Kelly and Senior Survey Technician Brian Bunge.  They had remained on board from the search phase.

    The survey finished at 0430H on Sunday 6 with all absolutely exhausted especially the ROV team, Mike and hydrographic surveyor Nigel (now dubbed ‘the Navigator’) Meikle.  He was supported by survey technician Hannes Vanroyen.  The nearly 18 hour survey was an immense drain on all, the pressure, the hours of staring at the video screen and monitors, the fatigue, all occasionally showing.  Mike Kelly had worked virtually non-stop calling distances and bearings to the ROV pilots, quickly responding to David Mearns’ requests for updates, bearings, distances, heights and information as he worked to fit all that was unfolding into his store of experiences and expectations.  He had planned and was now executing the inspection phase in the debris field meticulously and to a pre-ordered plan, refusing to be sidetracked.

    For his part John Perryman proved amazingly quick and effective in drawing on the plans of HMAS Sydney he had copied to the Sea Power Centre laptop, on the contemporary photographs and on images from the HMAS Sydney model in the War Memorial.  Using these and his own experience on naval ships he rapidly identified all bar a few of the features encountered and to help explain the pieces missing from each, for few, if any, were intact.  Each large target numbered S1-S13 and a host of smaller items seen en route like shoes; cartridges (including some embedded vertically in the seabed); paint tins; and the like were logged in time and position.  Glenys MacDonald and I also kept individual chronological manual logs of findings, adding descriptions and identifications as they were made.  I also plotted the ROV’s course on Mike Kelly’s map of the debris field.  This had been overlaid on his and Brian’s sidescan sonar record.  David, John and Glenys will have described many of the significant ‘finds’ in their blogs.

    The totally unexpected appearance of the first of the ship’s boats saw Glenys Macdonald flourish some of her photographic collection.  These showed some of them in operation and together with John’s detailed plans allowed us to quickly identify each type and the external fittings and fixtures on them.  To me, seeing the frames and the remaining ghostly strakes of planking on the carvel vessels was one of the most striking images of my archaeological career.  Then to find the largest boat, diagonal planked, square-sterned, with the skeletal remains of a carvel cutter across its gunwhales was even more remarkable.

    At 1155H, Sunday back down in the survey room after rising at 0800 to write up and prepare for this next phase, I finish with the note that the badges on each boat were another of the most evocative images I have ever seen.  Without exception these retained their features, their emblems and colours apparently undiminished on each bow.  Not wishing to appear too effusive I could not help thinking as I looked at them of the shoulder patch on John Perryman’s naval overalls in which he always appears.  Under the naval ensign appear the words ‘These Colours Don’t Run’.  


    Above Photograph: Sydney’s inverted bow was our first major discovery within the debris field.

    Above Photograph: The buckled stern and collapsed quarterdeck clearly indicated that Sydney had struck the sea floor stern first.

    Above Photograph: The crow’s nest sitting atop Sydney’s downed foremast.

    Above Photograph: The distinctive bridge deck head (roof) lying against the front of the Director Control Tower.

    Above Photograph: Without doubt the most chilling find in the debris field was the presence of five of Sydney’s life boats. Note Sydney’s official badge mounted on their bows.

    Above Photograph: One of Sydney’s 21-inch quadruple torpedo tubes lying upside down on the sea bed. Two torpedoes remain in their tubes.

    Above Photograph: The area of impact where Kormoran’s torpedo inflicted fatal damage on Sydney’s upturned bow section.


    Above Photograph: Gas Mask on sea bed.

    Photo Gallery Slideshow available at http://www.findingsydney.com/gallery.asp


    IMPORTANT NOTICE: The Material (including photographs) available in the "Press Room" section of this Website may be used/reproduced unaltered by your organisation (unless stated otherwise within the content description) subject to the terms and conditions set out in the Legal Section AND any Material (including photographs) which you use/reproduce must credit the source as "The Finding Sydney Foundation" and, as an option, you may also link the source statement with the website address http://www.findingsydney.com/.

    Photographer: David Mearns

  • 4th April 2008 - Report

    David Mearns – Search Director, The Finding Sydney Foundation

    Immediately after posting our search diary yesterday we were forced to recover the ROV because of an alarm telling us it was low on oil that is used to fill an important transformer housing.  This recovery also allowed us the opportunity to repair the problem we had yesterday which kept the ROV frustratingly shackled into its protective garage.  This made taking good images of HMAS Sydney virtually impossible, and although we had just enough decent pictures to release yesterday I was fully expecting the imagery we collected today to be much, much better.  Fortunately, I was not to be disappointed.

    In all I took over 340 still pictures in a single 12 hour dive today and the images are remarkable for both their stunning clarity and their brutal documentation of the punishment suffered by Sydney and her crew.  I have studied many historical accounts of the battle between Sydney and Kormoran but none of these could fully prepare me for the enormous damage withstood by Sydney.  At the end of the dive I paused to reflect on the horror experienced by Sydney’s officers and crew as they fought to save themselves and their ship.

    Of the many images of Sydney’s wreck two struck me the most.  The first was of a cluster of large calibre shell hits on Sydney’s starboard side.  Each 5.9-inch shell impacted against Sydney’s four-inch thick belt of armour and hull plate that was protecting her vital engine room and boiler spaces.  Whilst the shells did not fully penetrate the hull the damage and carnage they would have wreaked on the other side would have been enormous.  The truly amazing aspect of this picture (shown below), however, is that each of the 4 shells - undoubtedly fired separately, but by the same gun on Kormoran - all hit within a cluster only 20-foot high.  This image illustrates with terrifying reality the rapidity and deadly precision of the German gunnery.

    The second image speaks volumes for the bravery of Sydney’s own gunners closed up in “X” turret.  The men in this turret - the forward of Sydney’s two stern guns – have been credited by their German adversaries for firing the shells that ultimately led to Kormoran’s demise.  Because Sydney’s bridge and director control tower were destroyed at the start of the battle it is now clear that the men in “X” turret must have been shooting independently in local control.  Our pictures of “X” turret not only show it pointing forward frozen in its final shooting position but they also reveal the turret’s two forward hatches swung wide open, possibly to allow better aiming and firing by the gunners inside.  Despite their heroics, the men in “X” turret sadly met a similar fate to those in “A” and “B” as evident by the shell hits on its base.

    Our pictures also reveal a serious amount of damage to Sydney’s stern which I believe helps to explain the final sinking scenario.  Based on the buckling of the stern and the complete collapse of the main deck aft of “Y” turret there can be little doubt that Sydney hit the seabed stern first and that this damage resulted from the violent impact that ensued.  I further believe that the triggering mechanism for Sydney to sink by the stern was the moment her bow broke away from the hull at the surface.  The next important task for us on our upcoming dive is to locate Sydney’s bow, the position and condition of which should tell us far more about the sinking.

    Glenys McDonald - Director, The Finding Sydney Foundation (Observer)

    It has been an incredible day, but a very sobering one, as we recorded excellent video and still images of the wreck of HMAS Sydney.

    The ROV re-entered the water at 7am and went to depth.  This time we were able to fly free of the garage and therefore could go above the vessel and zoom in and down. We examined in detail the port side of the ship and John and I took copious detailed notes. The quality of the material is excellent.

    As the day unfolded the extent of the damage to our beloved ship was alarmingly clear and it may be distressing for some families.  In addition, more damage was sustained when the stern impacted with the sea floor. After the detailed examination of the bow and port side, we inspected the closest pieces of debris in the adjacent debris field.

    We then examined the starboard side. Although I knew that Sydney’s starboard side came under Kormoran fire as she turned as if to ram and limped off to the south east, I was horrified at the extent of the shell hits to this side of the vessel.  Several areas of the ship also bore the scars of terrible fire damage.  The damage we assessed matches closely the description given by the Germans.  Their concentrated firepower was incredibly destructive and accurate.

    Amongst this terrible destruction some items stood out proud and alone – a capstan, two bollards painted with stripes, a kedge anchor.  It was a very emotional and long day: so much destruction, so little chance of survival.  HMAS Sydney gave up many of her secrets today, may she now rest in peace.

    John Perryman – Senior Naval Historian (Observer)

    Following the success of yesterday’s initial ROV reconnaissance on HMAS Sydney (II) we determined that today we would re-visit the wreck and conduct a more detailed survey along the length and breadth of both her port and starboard sides.

    At 09:15 the wreck was sighted and the inspection began at the forward end of Sydney’s port side. Today we were more interested in noting details such as specific damage and what effect this may have had on crippling the cruiser.

    With the ROV now free of its garage and operating independently, we were soon unraveling some of Sydney’s long held secrets. During the morning we found that ‘A’ turret had received two hits in a similar position to where the front of ‘B’ turret had been struck, leaving two scars, low between its twin gun barrels. The ROV was then maneuvered around ‘A’ turret, which had lost its entire top and right-hand-side of the gun housing, leaving both 6-inch gun breeches and the rear of the turret exposed. A closer inspection of ‘B’ turret revealed that it had received a further hit in the base of the barbette on which it rested. These hits were the first of many viewed by us throughout the day and began to give us an insight to the accuracy of the Kormoran’s gunners.

    Further evidence of the fierceness of the engagement came when we returned to the bridge and forward superstructure. The base of the Director Control Tower had received a direct hit which had punched through it from the starboard side and exited through the port side leaving a gaping hole. The compass platform and bridge was a shambles and the forward screen below it had partially collapsed and was pushed back at an angle of about twenty degrees. On viewing this level of destruction, a hushed silence fell over the survey room as we continued to maneuver the ROV towards the rear of the ship.

    As we made our way aft, down the port side, the situation was the same. There were multiple hits on the ship’s side as well as on most of the structures mounted on her main deck. It seems almost impossible that any of Sydney’s wooden boats could have survived this onslaught and it almost certainly explains the shrapnel studded Carley float now on display at the Australian War Memorial, which was one of only a few items ever recovered from Sydney.

    When we came to ‘X’ turret which, according to the Kormoran survivors had fought on valiantly and dealt the German raider a mortal blow, we were amazed to find that as with ‘A’ and ‘B’ turrets she too had received two well placed shell hits in the front of her gun housing low between her gun barrels which were fully depressed. Draped over the top of ‘Y’ turret is what we believe to be the remnants of the after funnel.

    Approaching the stern it became apparent that the main deck had collapsed, sloping down to form a bowl-like feature as it met the extremity of the aft end of the ship. We then maneuvered around the stern and began our inspection of the starboard side.

    Somewhat surprisingly the starboard side of Sydney had received greater punishment than the port side, which had been the side initially engaged. There was evidence of consistent shell hits visible along the entire ships side, ranging from as high as the lip of the main deck to as low as the boot-topping which was level with the water line.

    As with the port side, Sydney’s 21-inch torpedo tubes were missing leaving only the ring gear, which once traversed them, remaining. Below this mounting were four closely grouped shell hits visible immediately below the main deck.

    As we made our way along the starboard side, we observed that the forward 4-inch high angle gun was missing as were several of the 4-inch ready-use ammunition lockers.

    Soon we were back in the mid ships area carefully negotiating our way around the wrecked ships aircraft crane before coming upon the starboard side of the forward superstructure. Again it was clear that this area had been severely pounded, with gun platforms twisted, fittings gone and multiple shell hits apparent. After a full day, our survey concluded at ‘B’ and ‘A’ gun turrets at 20:15 in the evening.

    One can only guess the desperateness of Sydney’s situation following such severe punishment. That some of Sydney’s crew were observed by their German opponents to be fighting to the last is no small wonder and a testimony to their courage and determination to press on. While the survey told us much, for all of us it was a sobering insight into Sydney’s final hours.

    Dr. Michael (Mac) McCarthy – Curator of Maritime Archaeology, WA Museum (Observer)

    On 19 March soon after the wrecks were found and after they had been declared historic (and a restricted zone was cast around them), I received a phone call from Patrick Flynn inviting me to join the search team for the ROV inspection phase. Having been officially involved with HMAS Sydney and HSK Kormoran since 1981, I was naturally keen to accept.

    After advising my Director of this development and of the fact that the Finding Sydney Foundation was in the process of drafting a request for permission to return to the sites, approval was received. Readers may be surprised to know that even Museum staff cannot work historic wrecks or enter restricted historic wreck zones without a permit nowadays!

    Terry Bailey, the Commonwealth Delegate of Minister Peter Garrett, then faxed a permit to the FSF allowing Geosounder entry into the restricted zones.  The permit, while allowing non-disturbance recording, prohibits contact with the wrecks and associated relics.  Additionally the wrecks, surrounds and relics are to be respected as ‘a gravesite’ and not be disturbed in any way.  This same non-disturbance brief was set back in 1991 when a search of the area specified by the Kormoran’s captain was first mooted.

    The permit also specified that a record of the activities was to be kept and provided to the Minister’s delegate. From there it is to enter the public domain. All notes, reports, track plots, film, sonar and multi-beam images from the search, finding and inspection phases will appear. Of special interest will be the underwater footage from the ROV. This record is continuously backed up and updated with time and sequential number by David Mearns’ nightshift offsider Robert Bruinsma.

    Today  the ROV, expertly flown by DOF Subsea’s Dave Norton and Bruce Berrman (supported by Kaamil Douglas, Dean Glazebrook, Simon Hall, Brett Murray and Peter Skinner), showed each shell hole and each battered and twisted feature along the hull and on the deck in alarming detail.  Reaction as the damage unfolded became more and more apparent on each pass and was one of great sadness.


    Above Photograph: “A” turret, with its gun housing destroyed and with the foredeck rent back over its twin gun barrels.

    Above Photograph: Sydney’s badly damaged compass platform, bridge and remnants of the base of the Director Control Tower.

    Above Photograph: A deep sea anemone adorns Sydney’s main deck.

    Above Photograph: One of Sydney’s port propellers and shafts dislocated from its normal position against the hull.

    Above Photograph: The front of the gun housing of “X” turret, credited by the Germans with inflicting the mortal blow on Kormoran.

    Above Photograph: This cluster of four 5.9-inch shell hits within a line 20-feet high clearly demonstrates the deadly precision of the German gunnery.

    Above Photograph: A capstan in the centre of Sydney’s stern sits elevated above the collapsed main deck with the two bollards in the foreground folded inward because of the same collapse.

    Photo Gallery Slideshow available at http://www.findingsydney.com/gallery.asp


    IMPORTANT NOTICE: The Material (including photographs) available in the "Press Room" section of this Website may be used/reproduced unaltered by your organisation (unless stated otherwise within the content description) subject to the terms and conditions set out in the Legal Section AND any Material (including photographs) which you use/reproduce must credit the source as "The Finding Sydney Foundation" and, as an option, you may also link the source statement with the website address http://www.findingsydney.com/.

     Photographer: David Mearns

  • 3rd April 2008 Report - HMAS Sydney II First Photographs

    David Mearns – Search Director, The Finding Sydney Foundation

    Whilst it has taken longer than expected I am very pleased we can now show the first pictures of HMAS Sydney to a waiting Australia.  At 15:10 (AWT) on Thursday 03 March 2008, our cameras focused on the first sections of Sydney seen for over 66 years.  We landed directly across “X” turret on the port side, where we intended, and it was immediately clear that Sydney was upright as I had felt from the side-scan sonar images.  The twin guns of “X” turret were pointed to port, as were virtually all the guns we could see viewing the wreck from the port side.

    Because we landed nearer to the stern we begin moving slowly in that direction to see if we could locate Sydney’s bell on the quarterdeck (sadly it was nowhere to be found) or possibly her name on the stern in case we were mistaken and her brass lettering hadn’t been removed as part of her wartime preparations.  But there was no mistaking that the wreck before us was that of HMAS Sydney and that her damage matched perfectly to what we expected from the side-scan sonar imagery and from the German accounts of the battle.

    Based on the characteristic impact damage I have seen with many deepwater shipwrecks I believe that Sydney hit the seabed stern first and slid 50 metres or so to her final resting place - dislocating at least one of her propellers shafts in the process.  Both funnels and masts were gone and all the lifeboats were missing from their cradle stands, but all four turrets were retained in place.  As per the German accounts the bridge and superstructure of Sydney withstood the worst damage as the heavy guns of Kormoran clearly had a devastating effect.  The bow was gone just forward of “A” turret in keeping with the torpedo strike in this location.

    After we traversed the entire length of the port side of Sydney we suspended our dive to immediately write up this blog and get these pictures out to everyone who have been waiting so patiently whilst we dealt with a myriad of technical problems and a prolonged period of bad weather.  I don’t want to dwell too much on what we have gone through over the past fortnight getting ready for this phase of the project, other than to say that everyone on board the Geosounder have worked incredibly hard against enormous pressure and with impossible weather conditions to finally deliver these first pictures.

    With this important first step – positively identifying the wreck of Sydney – of this phase out of the way we have much more work to do in a very limited period of time and with an uncertain weather window.  We are still operating somewhat hamstrung by the fact that we are unable to use the ROV in its normal free flying mode as a technical fault has restricted it within its protective garage.  Nevertheless, the underwater visibility is superb and we intend to collect as much video and photographic imagery as we possibly can after the ROV is recovered and repaired.

    Glenys McDonald - Director, The Finding Sydney Foundation (Observer)

    I have waited nearly 20 years for today.  Right from the start everything we have all worked for appeared to be finally coming together.  After days of big swells the seas had calmed, the ROV technicians were smiling, and we looked good to go: we were going to get our dive.

    The atmosphere in the survey room, two decks below was filled with anticipation as we watched the ROV slowly descend nearly 2450 metres.  Nigel the navigator patted me on the shoulder and said we were going to be right on target, I felt so nervous.  All we could see was a blue screen with a bright light and the occasional fish.  Then there was a shadow, and almost immediately HMAS Sydney appeared in front of us.  It is impossible to convey to you the depth of feeling in that room as we watched in awe as the stern of Sydney and her “X” turret came into view.

    The ROV operators did an incredible job panning in and along the port side of our mighty ship and around the broken bow.  So much was recognisable as we compared what we were seeing with our plans and photographs.  I cried as usual, I could not help it, because I could anticipate what these photographs were going to mean for so many of the relatives of the crew that I had come to know and love over the years. The crew of the Geosounder shared the moment with us, we had all worked towards this outcome. To my fellow Directors on shore, bravo zulu.

    John Perryman – Senior Naval Historian (Observer)

    At 15:10, 3 April 2008 the unmistakable image of a Mark XXI 6-inch gun turret came into view on our video monitor in the SV Geosounder’s remotely operated submersible vehicle (ROV) control room.

    Operating at a depth almost 2.5 kilometers below us, the ROV had been carefully lowered to the sea floor before slowly creeping up on the wreck of HMAS Sydney (II). We did not have long to wait before we received the final proof necessary to eliminate any doubt whatsoever that this was her. The ROV illuminated the wreck adjacent to X and Y gun turrets which lay mute with their guns still trained to port, pointing forward at an angle of approximately 45 degrees. The top of “Y” turret was covered in some wreckage and there was evidence of a large split in the deck immediately next to it.

    As the ROV was maneuvered aft along the main deck, one of Sydney’s propellers came into view on the sea bed as did the stern and ensign staff which lay across its teak decking.

    The ROV was then steered forward along the port side so a full inspection of the length of Sydney could be made. As the height of the ROV was adjusted, the aft end of the senior officer’s accommodation came into view and we began to see more signs of damage. The aft searchlight platform and mainmast were both gone, as was the 0.5 inch quad mounting and aft funnel. Both 4-inch high angle guns on the port side gun deck were in place and trained to port but there was no sign at all of the quadruple 21-inch torpedo tubes, only the disc and ring gear that they were once mounted on remained.

    As we continued forward we located the circular mounting for the aircraft catapult and the remains of the aircraft crane. At the same time we observed several large shell holes in Sydney’s port side above the water line. No evidence of any of Sydney’s boats remained and there was only a gapping hole where her forward funnel had once stood. The foremast too, had been carried away.

    Soon the bridge and superstructure came into view and it was immediately obvious that this part of the ship had been subjected to severe punishment. The Mark II quadruple 0.5 inch gun platform had partially collapsed, both the Director Control Tower and High Angle Control Station behind the compass platform were gone and the bridge was completely devastated. The starboard side 12 foot UK-1 range finder was one of only a handful of readily identifiable features in this area.

    Continuing forward we came across “B” and “A” gun turrets, both of which were still trained to port. Part of the top of B turret was completely missing and there was a neat round hole punched through it between the two gun barrels where it had received a direct hit. “A” turret’s housing was also very badly damaged with little of it remaining.  It was at this point that the wreck of HMAS Sydney ended, with her bow completely missing from immediately forward of “A” turret.  The damage in this area showed signs of what may have been a violent explosion as the deck had been rent upwards and folded up over the gun barrels of “A” turret.  The ship’s side of Sydney in this area had been peeled back too and this could have been the result of the Kormoran’s torpedo hit on her.

    At this point the inspection was suspended to allow time to record our observations for a waiting world.  Although in a badly damaged state, this great warship retains a powerful aura, in her final resting place off the Western Australian coast.

    Dr. Michael (Mac) McCarthy – Curator of Maritime Archaeology, WA Museum (Observer)

    Given the images I had seen of other deepwater warship wrecks, the port side of HMAS Sydney, down which we traversed from 1510H when the stern first appeared out of the gloom, has retained far more of its superstructure than I had expected.  Thanks to the detailed builder’s plans obtained by Lieutenant John Perryman RANR, those foldouts appearing in Wes Olson’s book and a few tracings I had made of them, we were able to follow progress along the wreck quite well.  Occasionally we (I) got lost, but pretty soon we were back on track able to identify fittings and fixtures, features, lines of scuttles and so on.  In this we were fortunate to have the crew of the Geosounder who crowded into the survey room behind us, quickly proving adept at ensuring items familiar to them in their everyday work were quickly recognised, identified and located to plan. 

    While the funnels of HMAS Sydney are gone as expected, either as a result of the battle or the long slide into the depths, all the large guns remain and the teak deck is visible in places.  The seaplane recovery crane is there, albeit a tangled wreck and boat cradles are in place.  The border between differing shades in the camouflage painting is clearly evident in some parts as is the boot topping (thick painted strip) along the waterline.  Concretions, as expected, are non-existent leaving the hull looking very much as it would in its final hours afloat.

    Above Photograph: Port side cradle for aft 27 foot whale boat (missing).

    Above Photograph: Areas of Sydney’s teak decking remain remarkably intact.

    Above Photograph: Midships kedge anchor.

    Above Photograph: Upturned searchlight platform torn away from forward funnel.

    Above Photograph: Some of the many portholes visible on Sydney’s port side.

    Above Photograph: “B” turret showing evidence of a direct hit between gun barrels and damage to turret roof.

    Above Photograph: Wreckage strewn on top of “Y” turret.

    Photo Gallery Slideshow available at http://www.findingsydney.com/gallery.asp


    IMPORTANT NOTICE: The Material (including photographs) available in the "Press Room" section of this Website may be used/reproduced unaltered by your organisation (unless stated otherwise within the content description) subject to the terms and conditions set out in the Legal Section AND any Material (including photographs) which you use/reproduce must credit the source as "The Finding Sydney Foundation" and, as an option, you may also link the source statement with the website address http://www.findingsydney.com/.

    Photographer: David Mearns


© Copyright HMAS Sydney Search Pty Ltd 2004-2010. Legal Information | Privacy Policy | Contact Us
Site Designed, Developed & Maintained by Glenfield Systems.